2:58 AM Auto Top-Off (ATO) Systems: Benefits and Setup Guide | |
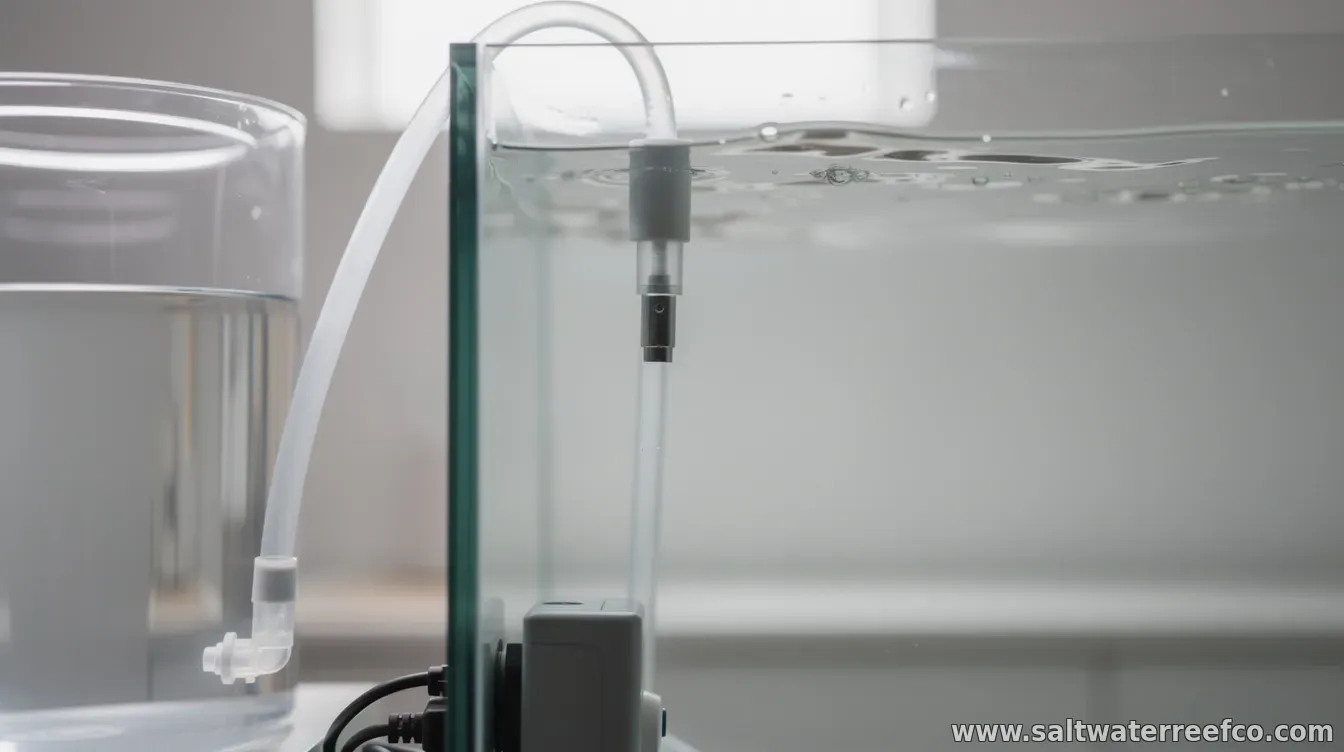
Evaporation is inevitable in most aquariums, but it can steadily change salinity, strain sensitive equipment, and disrupt water parameters—especially in saltwater and reef tanks. An Auto Top-Off (ATO) system solves this by automatically adding small amounts of freshwater to maintain a consistent water level. Whether you run a coral reef, a planted tank, or a sump-based setup, stable water level supports stable chemistry. ATO systems are designed to be simple: they detect when the water drops and then supply a controlled amount of freshwater until the level returns to target. Why you need an ATO systemManual top-offs work, but they’re easy to miss during busy schedules or travel. An ATO reduces the day-to-day variability caused by inconsistent refilling and evaporation rates that change with temperature, airflow, lighting intensity, and room conditions. For saltwater tanks, keeping water level steady helps protect salinity stability—because evaporation removes only water, leaving salts behind. For systems with dosing or reactors, consistent water level can also help keep pumps and filtration running at predictable ranges. Key components of an ATOMost ATO setups share the same core parts:
Choosing the right sensor/controller combination matters because it determines both accuracy and safety. If your ATO lacks a reliable backup strategy, consider adding one before relying on it. How to set up an ATO system (step-by-step)Before installing anything, confirm your aquarium’s layout—where evaporation-related water level changes are most visible (often in the sump). Plan where the reservoir will sit, where the tubing will route, and how the outlet will prevent splashing or salt creep. 1) Mount the sensor(s): Install sensors in the sump at specific positions so they can clearly detect “low” and “high” levels. Many reliable systems use two levels—one to trigger top-off and another as an emergency cutoff. 2) Position the reservoir: Place the reservoir on a stable surface below the sump outlet so the tubing can feed consistently. Use clean, aquarium-safe RO/DI freshwater to avoid introducing unwanted minerals. 3) Connect the pump and tubing: Route tubing to minimize kinks and ensure the return point is appropriate. Aim for gentle delivery—typically near a stable flow area—so added water mixes without creating localized overflows. 4) Set the target water level: Define where “full/normal” should be based on your sump’s typical operating level. Adjust sensor heights so the system only runs when water drops due to evaporation. 5) Configure controller safety settings: Set a maximum run time (or maximum top-off volume, if available). This is crucial in case a sensor fails, tubing becomes stuck, or debris interferes with readings. 6) Test manually before full reliance: Run short tests to confirm the pump starts and stops correctly at your set points. Watch for leaks, noisy operation, erratic sensor behavior, and any signs the outlet return disturbs the system. Calibration and ongoing maintenanceAfter installation, calibrate and verify operation as conditions change. Many sensors benefit from periodic cleaning—especially in sumps where biofilm, salt residue, or bubbles can interfere with readings. Also monitor the system after big changes: new equipment, changes in room temperature, upgrades to lighting, or modifications to sump flow. Evaporation rates can rise quickly, so verify that your ATO isn’t constantly running or frequently hitting safety time limits. Troubleshooting common issuesIf your ATO behaves unpredictably, check the most frequent causes first:
When in doubt, pause operation and return the system to a safe baseline rather than continuing to test under normal load. An ATO system isn’t just convenience—it’s a tool for stability. With careful sensor placement, sensible safety limits, and a thorough initial test, it can help your aquarium maintain consistent water level while reducing the chance of parameter swings caused by evaporation. | |
|
| |
Next & Previous posts