2:08 AM In-Wall Aquariums 101: Benefits, Costs, and Design |
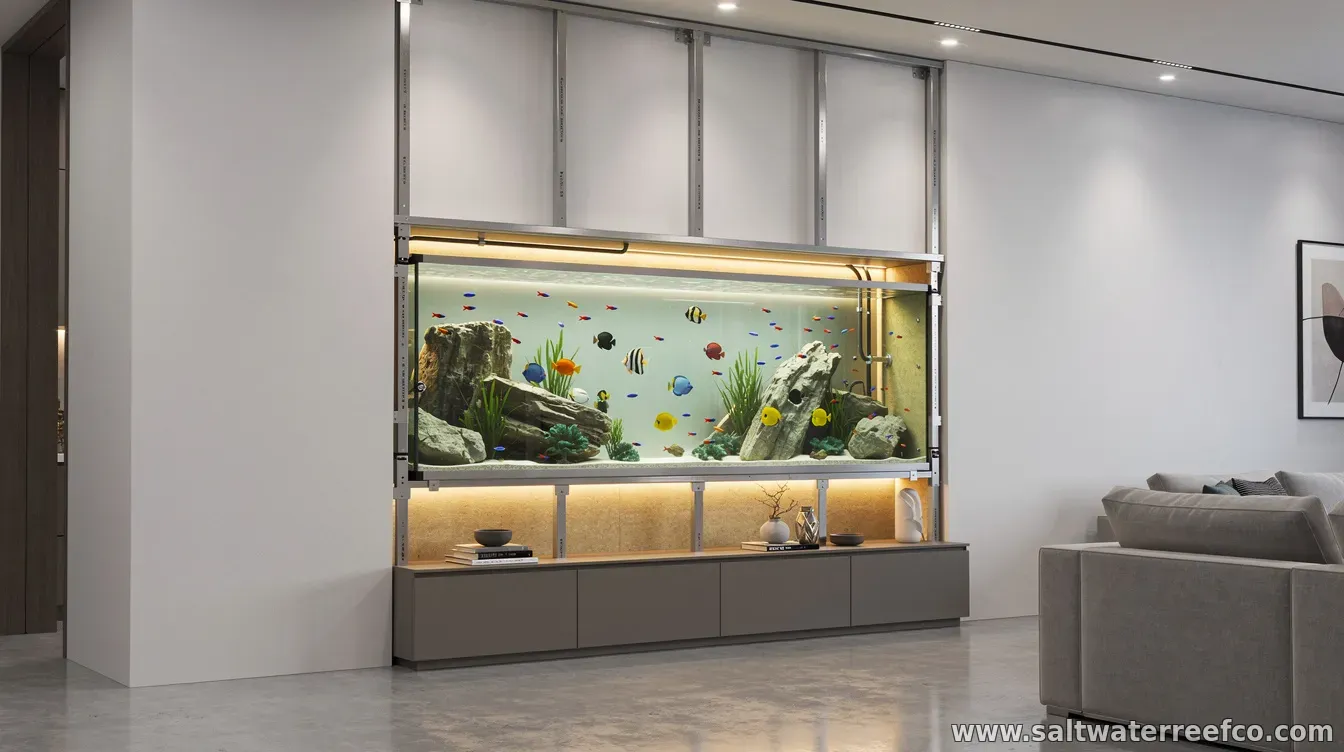
In-wall aquariums turn a regular interior wall into a living display, offering an eye-catching look without sacrificing as much floor space. But unlike a standard tank setup, an in-wall installation must be engineered to manage enormous loads, prevent leaks, and comply with safe electrical and plumbing practices. Why homeowners choose an in-wall aquariumThe main appeal is visual: a properly designed in-wall tank looks built-in, often acting as a focal point in shared spaces like dining rooms, hallways, and living areas. Because the tank sits within a wall cavity, it can also free up floor space for seating or foot traffic—an important factor for smaller homes or dense urban layouts. Potential benefits (when built correctly)Beyond aesthetics, in-wall systems can be convenient. Many designs allow equipment to be hidden in the wall or adjacent service bays, reducing visible clutter from filters, heaters, and tubing. When the wall is planned around access panels and maintenance pathways, routine tasks—like water changes and filter servicing—can be simpler than with poorly placed display tanks. There’s also a practical safety angle: with the right framing and waterproofing, an in-wall aquarium can be contained within a controlled structural envelope. That containment can reduce the risk of water spreading through the home if something goes wrong, provided the build includes leak detection or reliable drainage strategies. Costs: what drives the priceIn-wall aquariums are typically more expensive than stand-alone tanks because they involve construction work and custom fitment. Costs often depend on tank size and shape, the complexity of the wall buildout, and whether you need structural reinforcement. Labor can also be significant if a contractor must modify framing, relocate plumbing, or add electrical circuits. Common cost drivers include:
Even for the display itself, “apparent simplicity” can hide engineering complexity. As a result, budgeting typically benefits from a contingency line for unexpected framing adjustments or water-testing and finishing work. Design considerations you shouldn’t skip1) Load calculations and structural support. Water weighs roughly 8.3 pounds per gallon, which means a larger in-wall tank can impose substantial weight on studs, beams, and the floor system. A qualified professional should confirm that the wall framing—or adjacent structure—can safely handle both the tank and any additional equipment or shelving loads. 2) Waterproofing, leak management, and inspection access. An in-wall design should treat water containment as a first-class requirement. That generally means careful sealing of penetrations, reliable waterproof layers where needed, and planned access points for maintenance and inspection. Some owners add leak detection sensors or design secondary containment to limit damage. 3) Filtration, plumbing, and serviceability. Display tanks still require stable filtration and temperature control. In an in-wall setup, tubing runs and equipment placement matter: they should be routed to reduce kinks and maintain clean paths for water flow. Equally important is access—if you can’t service the system without major demolition, long-term ownership becomes frustrating and costly. 4) Electrical safety and moisture-proofing. Aquarium installations involve water and power, so electrical work should follow local code and use appropriate protection (often GFCI). Plan cable routing away from splash zones, keep connections accessible but protected, and avoid improvised junctions hidden inside finished walls. 5) Ventilation, humidity control, and wall finishing. Even with excellent waterproofing, aquariums create humidity. Without proper airflow and moisture management, walls and finishes can degrade over time. Consider materials designed to handle damp environments and ensure the surrounding wall cavity won’t trap moisture. 6) Lighting and viewing angles. Aesthetics matter, but so does animal welfare. Lighting should be chosen for the species you plan to keep, and glare control helps the display look premium rather than washed out. Many owners also plan sightlines so the tank reads clearly from common seating and standing positions. Installation pathway: how to approach the projectMost successful in-wall aquarium builds follow a sequence: confirm the wall location and structural feasibility, select the tank footprint and filtration approach, plan electrical and plumbing routes, then build the waterproofed cavity with service access in mind. Before final finishes, many builders run leak tests and verify that the system can be maintained without dismantling the display. Because requirements vary by jurisdiction, tank size, and home construction type, it’s often wise to involve professionals early—particularly for structural review and electrical work—so design assumptions match real-world constraints. With the right engineering and planning, an in-wall aquarium can deliver a seamless, high-impact feature that’s both beautiful and durable. But the best results come from treating the project like a custom build—where safety, containment, and service access are designed in from day one. |
|
|
Next & Previous posts